At a time when the concept of environmental protection is deeply rooted in people’s hearts and the demand for energy transition is becoming more and more urgent, the integrated solar street light has emerged as a popular choice in the field of lighting. It cleverly converts solar energy into electricity to achieve green lighting, which greatly fits the theme of sustainable development. Whether it is the backstreets and alleys of the prosperous city, or the winding lanes of the quiet countryside, or even the infrastructure construction in the remote mountainous areas, you can see its figure. In order to help you give full play to the advantages of this type of street light, the next will provide you with a detailed introduction to the whole process of installing one-piece solar street lights.
The integrated solar street light is a masterpiece of lighting technology, which cleverly integrates solar panels, LED lights, batteries, and controllers in a compact unit. This innovative design brings a lot of convenience. On the one hand, the components work closely together, which saves space and simplifies the otherwise complex structure of the streetlight. On the other hand, it also makes the installation process much easier; even for non-professionals, the installation can be completed under certain guidance, and in subsequent use, the simple structure reduces the difficulty and frequency of maintenance.
From the environmental point of view, the integrated solar street light uses solar energy as a clean energy source, achieving zero carbon emission in the entire lighting process, contributing to the protection of the earth’s homes. In terms of application scenarios, its flexibility is commendable. In the city streets, it illuminates the road ahead for pedestrians and vehicles; in the country lanes, it brings light to villagers returning home late; in parks and scenic spots, it creates a warm and romantic atmosphere; even in remote mountainous areas, it can easily meet the lighting needs without complicated wiring and external power supply.
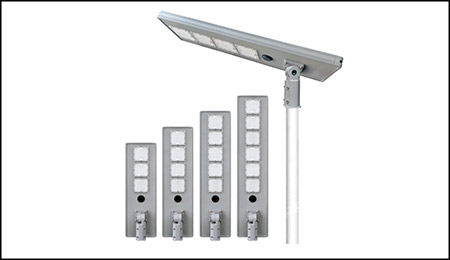
First of all, you need to select the one-piece solar street light that suits your needs. If the lighting area is large, you need to choose a larger power street lamp to ensure sufficient light. At the same time, according to the local lighting conditions, to choose the right battery capacity of the street lamp, short light hours in the region, high-capacity batteries can ensure that the street lamp works properly at night. After receiving the streetlight, make sure to carefully check the appearance of each component for damage and whether the accessories are complete, such as whether there are scratches on the solar panel, whether the LED lights are intact, whether the packaging of the batteries and controllers is complete, etc. In addition to the main body of the streetlight, you need to prepare the battery and controller for the streetlight.
In addition to the main body of the streetlight, you also need to prepare the auxiliary installation materials and tools. For the installation of fixed materials, if the installation of poles is required, prepare the appropriate specifications of the bolts, screws, and matching spanners; if the installation is wall-mounted, in addition to bolts and screws, you will also need a suitable screwdriver. Installation of different heights: The choice of climbing equipment is also different; the shorter position can use ordinary ladders, while the higher position requires professional lifting equipment. At the same time, do not ignore the personal protective equipment: gloves to protect hands from being scratched and helmets and safety glasses can protect the head and eyes at the critical moment to ensure that the installation process is safe and secure.
The choice of installation location is directly related to the efficiency of the streetlight. Try to choose a place with sufficient light throughout the day, because the solar panel needs sufficient sunlight to charge the battery. Generally speaking, there should be at least [X] hours of direct light per day to ensure the normal operation of the streetlight. Differently oriented locations have different hours and intensity of light in different seasons; e.g., a south-facing location can get more light in winter in the northern hemisphere, so comprehensive consideration should be given when selecting a site.
At the same time, it is important to carefully check the surrounding environment to ensure that the installation area is free from shadows created by trees, buildings, and other objects that would block the solar panels. Even partial shading can significantly reduce the charging efficiency of the solar panels and, in severe cases, may result in the streetlight not working properly. When selecting a site, you can go to the location at different times of the day to observe the light conditions, plan the installation location in advance, and avoid areas that may produce shadows.
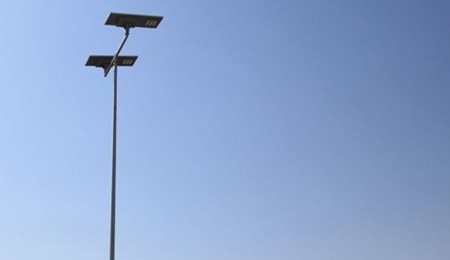
If the installation is done with a riser, the stability of the new riser is crucial. First of all, according to the weight of the streetlight and the local wind conditions, determine the appropriate depth of the excavation pit, usually around [X] cm. Then pour concrete according to a certain ratio; usually the ratio of cement, sand, and stone is [X]:[X]:[X] to ensure that the riser can be firmly buried in the ground with good wind and seismic capacity.
In case of wall mounting installation, you should first judge the load-bearing capacity of the wall. You can find out by observing the wall material and asking the building owner. Select the appropriate expansion bolts, according to the mounting holes of the bracket, use the electric drill to make holes, drive the expansion bolts into the holes, and then fix the bracket on the wall to ensure that the bracket is firmly installed and can withstand the weight of the streetlight.
Carry the street light to the installation position and carefully align it with the mounting bracket. During the alignment process, make sure that the streetlight is level, which can be assisted by tools such as a level. After alignment, tighten the bolts gradually, in diagonal order in turn, which will ensure a smoother installation of the street light without shaking.
After the installation is completed, you need to check the solidity of the connection. You can use your hand to slightly shake the street light, and observe whether the connection parts are loose. If you find any signs of looseness, you need to make timely adjustments and re-tighten the bolts to ensure that the street light will not be damaged due to shaking in subsequent use.
There is a lot to learn about the angle adjustment of solar panels, and their optimal angle is closely related to the local latitude as well as the season. Generally speaking, in spring and autumn, the angle between the solar panel and the ground is about the local latitude; in summer, the angle can be appropriately reduced, and in winter, it is appropriately increased. This adjustment allows the solar panel to receive as much sunlight as possible in different seasons, improving power generation efficiency.
In the practical adjustment, with the help of a level, adjust the solar panel according to the calculated angle. After the adjustment is completed, lock the fastening bolts to prevent the solar panels from changing the angle due to wind blowing and other reasons, which will affect the power generation effect.
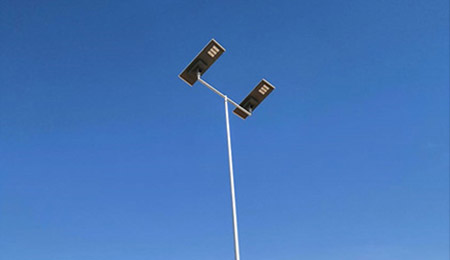
After installing the street light, conduct a function test. Cover the solar panel completely with light-shielding objects, such as thick cardboard, to simulate the night environment. Under normal circumstances, the LED lights should come on automatically within a short period of time. If the light does not come on, do not panic, you can first check whether the wiring connection is loose and see whether the controller is set correctly. If the problem still cannot be solved, it is recommended to refer to the troubleshooting guide in the product manual or contact the manufacturer’s after-sales customer service for assistance.
After completing the above steps, conduct a full inspection. Check the tightness of all the bolts and screws again to make sure that the street light will not be a safety hazard due to looseness even in bad weather. At the same time, check the surface of the solar panel for dust and stains, and if so, clean it in time to ensure that the solar panel can absorb sunlight efficiently. Also check the appearance of the lamps and lanterns are not damaged, to ensure that the street lamps can run stably for a long time.
We hope that you will operate in strict accordance with these steps and points to complete the installation successfully and fully enjoy the environmentally friendly and efficient lighting experience brought by the integrated solar street light. With the continuous progress of science and technology, we believe that the installation of one-piece solar street light will be easier, and the application scenes will be more extensive, bringing more convenience and green for our life.

